Android Firebase Configuration
1. Adding a new project

Navigate To Firebase Console and click Add a project. If you already have one then click the project and follow form step 4.
2. Project Name
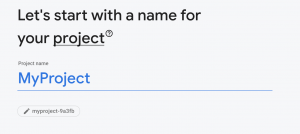
Add the project name.
3. After that Google will ask to enable google analytics. Click continue.
4. Configuring google analytics.

Click default Firebase Account and Click create project.
5. Creating an android app for Firebase

Click the android icon to add an android project.
6. Adding Package name and Sha1

Here you can add unique package name: com.<yourcompany_name>.<app_name>.
Sha1 key is used to enable google sign in in the apps.
Run the following command on the terminal for mac/ubuntu and cmd for windows:
keytool -list -v -keystore ~/.android/debug.keystore -alias androiddebugkey -storepass android -keypass android
Then add the key to the above form and click register app.
7. Adding the package name to code
– Open the project’s android folder android with Android Studio and let the project build itself for a while.
– In your Project pane, click on the little gear icon![]()
– Uncheck the Compact Empty Middle Package Option.

– Your package directory will now be broken up in individual directories
– Individually select each directory you want to rename, and Right-click it
– Select Refactor
– Click on Rename
– In the Pop-up dialog, click on Rename Package instead of Rename Directory
– Enter the new name and hit Refactor
– Click Do Refactor in the bottom
– Allow a minute to let Android Studio update all changes
– Note: When renaming com in Android Studio, it might give a warning. In such case, select Rename All

- Now open your Gradle Build File (build.gradle – Usually app or mobile). Update the applicationId in the defaultConfig to your new Package Name and Sync Gradle, if it hasn’t already been updated automatically:

- You may need to change the package= attribute in your manifest.
- Clean and Rebuild.
8. Adding JSON File

After that download the json file and add it to the location specified here and click Next and complete the process and run the app from your system.
9. The verification Step

You will see this green bar confirming that your app has been registered successfully.